Tuesday, April 24, 2012

The Haul Out

We set off for the boat yard early Monday morning for our 12:30 appointment for haul out.  We expected it to take approximately 4 hours using the electric motor and figuring in some extra time to go through the Ortona Lock.  We made it right on time.  As stated in my last post, the next project was to finish wiring the panels.  Carter took advantage of the 4 hour trip to get some of this work done.


I'm sure this is 'old hat' for some of you out there but this is all new to me and it was facinating.


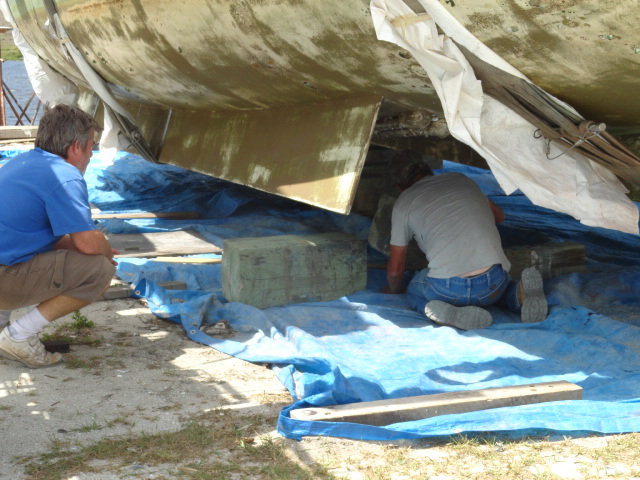
There was much discussion about where to place the straps.


She's out and ready to be cleaned up.


And now to go to our spot in the yard for the next couple days.


With the twin keels it was pretty simple to block it up and set her down.


Not too many barnacles.
But there were quite a few oysters on the keel cooler.


Carter worked the first part of the day scraping the oysters off and detailing it out.


Nice job.


There is just so much more work to be done!


Getting Ready for the Yard

There has been lots to do getting ready to go to the boat yard for the much needed bottom job. Carter estimates the boat hasn't been hauled out in over 15 years.  We also plan to paint the freeboard. We'll see how far we get.

But first we had to begin cleaning up our yard in the oxbow and we started with the Airstream.  We have been trying to sell it ourselves but to no avail.  Carter found an RV Exchange up in Tampa that will sell it for us on consignment so he set about replacing the flooring to make it more appealing to prospective buyers.  It turned out really good!  He also had a friend come by to repair the tongue. Then we pressure washed it and off to Tampa we went.


Good as new!

In preparation for the possibility of getting water in the cockpit,  Carter has placed weatherstripping around the opening for the engine room. He will double protect the opening with caulk.


Carter decided to put the original pulpit back on the boat.  He rented a pipe bender, we made a few key bends and now we have a pulpit! 


We spent a day washing and scrubbing the boat in preparation for painting. Carter recruited some help to come over and prime the superstructure and and the walkways.
We put non-skid on the walkways... niiiice!
The deck is cleared off and scrubbed down and a layer of primer is going down.
Next Carter worked on finishing up some structural issues to install the remaining 4 solar panels. The main column needed to be centered on the hinge for the actuator to line up with later on and some additional bracing needed to be installed. Above, the panels are in the full upright position to allow Carter access to remove the old wood structure.
SURPRISE!  Frog the face.
When we dropped the old wood beam we found a stowaway...

Just hangin around while Carter continued to work!


We relocated him to the scrap pile!
He seemed happy enough.


 Ribbit....Ribbit


We had to take out the center posts so the panels could be lowered all the way to the deck .  We left a stub to be incorporated into removable handrails that can double as gangways. We covered the cockpit floor with gangplanks. 


And the last 4 panels are up!


Next will be the task of wiring them up.

In the middle of all this work, our friends Gordon and Kim came by and joined us for dinner
"on the lanai"  !  LOL


Some of the darndest things happen.  Just before dinner, a boater from across the river informed us that our whaler had slipped its mooring and blown across the oxbow.  No problem,  Carter jumped in the kyack and went to the rescue!


If you look close you can see the whaler under the catamaran's right starboard wing. 
  Boston Whaler in the right corner pocket! Ha! Ha!


We topped off the day with a sunset cruise in the rescued whaler. 
The Caloosahatchie is blessed with some of the most beautiful sunsets I've ever seen.


We are spending this weekend cleaning up the yard behind us and packing up the boat
 because once we are out of the boat yard we intend to make our way across
Lake Okeechobee and then North from Stuart to Cape Canaveral.   
The Oxbow in LaBelle


Wednesday, April 4, 2012

Dolphins Love Us!

I was able to get some pretty good video of a pod of dolphins following along side us on our return trip from Fort Myers and FINALLY found some software to convert it to a .wav file!  So...for your viewing entertainment!


I love Dolphins!

Test Runs Successful !!

We are both pretty pumped...to say the least...that we have successfully completed 3 test runs with perfect performance from the electric motor.  The first run lasted approximately 20 minutes, the second one lasted about 45 minutes.  The third run included a trip to the marina to empty the holding tank and fill the water tanks with the entire excursion totalling 1 1/2 hours on the motor and there were no signs of overheating by either the motor or the controller. 

Our max speed was 5.7 mph 120amps and we cruised along nicesly at 4.5 mph at 82 amps. When the solar array is finished we'll have 100amps whenever the sun is shining.  Woo Hoo! 


2nd shakedown cruise
Carter was able to upload a video of the 1st shake down cruise to an electric motor blog he has been following for some time now and our blog received visits from all over the world.  We also added a couple of new followers.  Welcome!

Right after these test runs we've had to stop work on the boat to do other necessary items on the to-do list in preparation of our impending migration North but we will be back to work on the Archimedes soon!

Thursday, March 22, 2012

Wiring the Electric Motor

Once the motor was installed, Carter set about running the 1/0 welding cable from the batteries in the center bilge to engine room where the motor and controller are.  First he had to run large wires to the engine room, then create the connections for the control box.

Here the wires are in the mechanical room adjacent to the bilge compartment with the batteries.
From the mechanical room they pass thru a structural bulkhead and run under the
kitchen sink in the galley.

This shows the wiring under the galley sink and going thru the cabint behind the stove.


And finally they go thru another concrete and steal structural bulkhead into the engine room right at shelving where they connect to the controller and then to the motor. 

But first, Carter will finish preparing the control board. Here the controller is mounted on an aluminum heat sink before all the control wiring is connected.

Here, Carter is making a termination on one of the welding cables. Each one is pressed on with a hammer and then soldered for a good connection.

And then a piece of shrink wrap to cover up the messy connections.

Before he can finish the motor Carter has to reroute the fuel line to the diesel engine because it was in the way of the chain.


Not a lot of extra room to move around the engine but it could be worse.
 For a boat this is actually a pretty spacious engine room.

Close up of the motor with the wiring installed.

Here you can see the controller on the shelf with the electric motor on the left by the engine.

Just a few more details in the mechanical room and then we'll start her up!

Stay tuned.


Saturday, March 10, 2012

The Electric Motor

While we are waiting for our sample linear actuator to arrive so we can put the finishing touches on the solar array Carter decided to focus on mounting the electric motor. This has been a high anxiety project because Carter wasn't sure exactly how he was going to do it. He has worked steady for the past week fabricating the mounting brackets and figuring out how to install the thing.

With an idea in mind he started out cutting two 1/4" metal plates for each end of the motor.


After shaping them to fit better he mounted two pieces of angle on each side.

Getting the mount lined up with the drive train was critical. There where a lot of weird angles with the hull of the boat sloping up and the drive line sloping down it was going to be tricky getting the shaft properly aligned.

He fastened a piece of aluminum to drive train sprocket to line up the support angle. This worked well.

Lugging the 100+ pound motor into the engine room was a chore.

But actually getting it mounted to steel supports in the engine room was a nightmare.

Blocking, shimming, drilling, bolting.

The chain lined up perfectly.


Dirty, sweaty, skinned knuckles, and sore back but success.
Now comes the hard part, wiring the darn thing up.